How to Sew PVC Patches: A Simple and Lasting Attachment Method
A simple long-lasting and yet permanent way to attach different PVC patches to clothes and accessories is to sew them on. We can sew them by hand, or to make the process go faster, we can use a sewing machine or embroidery machine. Here’s a quick guide to get you started:
Hand-Stitching: The charm of the past
It’s a centuries-old and traditional way of attaching patches to garments. Anyone with a bit of experience can easily use this method.
Pro’s
- Budget-friendly: No expensive tools required, making it cost-effective.
- Personal touch: Every stitch has its own story, which makes it more special.
- Precise placement: great for complicated patterns or challenging areas.
Cons:
- Time-consuming: Working on a Large patches or numerous projects may take a lot of time.
- Skill-dependent: Depending on your skills, you’ll need basic sewing skills and a steady hand to do this right.
Material Required:
- PVC patch
- Needle
- Thread (choose a thread color that matches the patch or fabric)
- Thimble (optional)
- Scissors
- Pins (optional)
Position the patch. Put the patch on the hat, clothing, bag or where you want to sew it. If you need to, use pins to keep it in place.
Thread the needle: Cut a length of thread about 20 inches long minimum for small patches or big enough for large patches depending on their sizes. Put the thread through the needle and knot the end.
Start Sewing. You can sew a patch on with a few different stitches, but a simple backstitch is good for newbies. First, push the needle up through the fabric and the patch. Then, push it back down through the fabric a little before where it came up. Once the thread is tight, push the needle back up through the fabric just in front of the last stitch. Do this again and again until you reach the edge of the patch.
Here are some more tips on how to sew a PVC patch by hand:
- Use a needle that is sharp enough to pierce the PVC without breaking.
- Put a thimble over your finger to keep the needle from poking it.
- When sewing a patch onto a thick piece of cloth, you might want to use a heavier thread or a bigger needle. Be careful not to sew too close to the edge of the patch, as this could tear the PVC.
The more you do it, the better you’ll get at sewing PVC patches onto your clothes and gear.
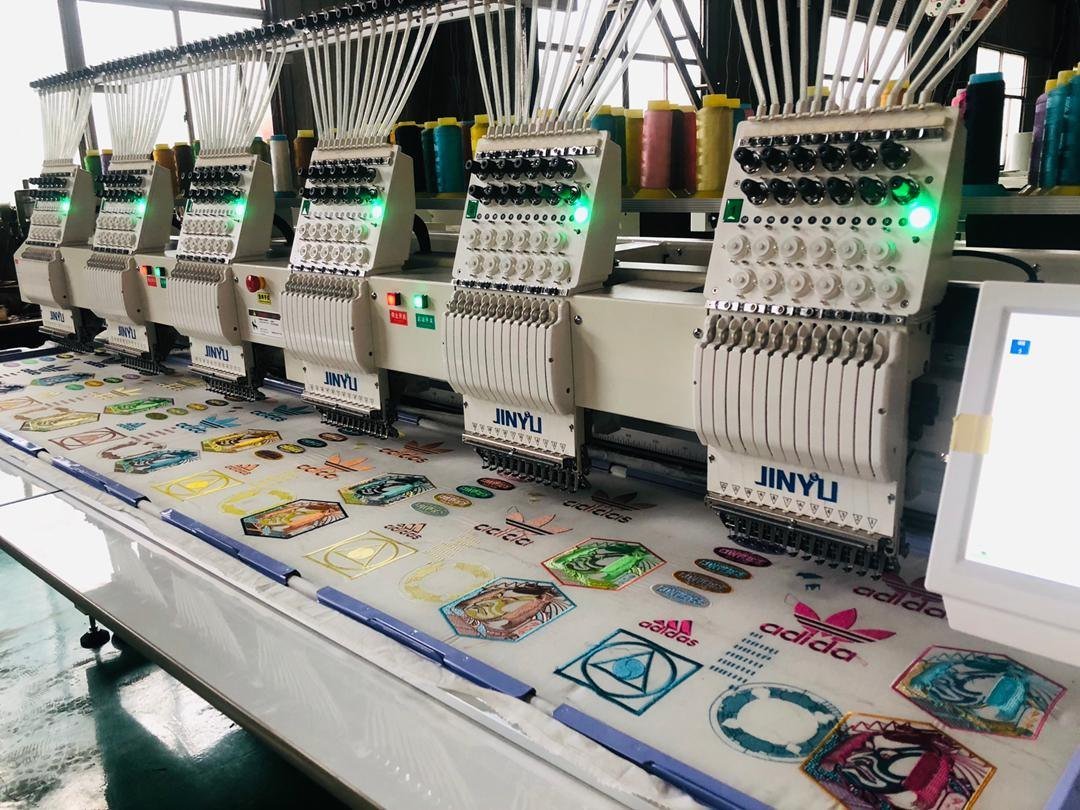
Embroidery Machine: The Speed Demon:
Sewing PVC patches with an embroidery machine is a bit different from working with fabric patches due to the nature of the PVC material. Here’s a step-by-step guide to help you sew PVC patches using an embroidery machine:
Top of Form
Pro’s:
Quick production: Takes care of big jobs like a pro.
Consistent quality: Every patch looks like it was made by a pro.
Cons:
Heavy Investment: Embroidery machines can be expensive.
Learning curve: It takes some time to learn how to use the program and especially the machine, which sometimes requires technician help to get started and learn the basics.
Machine compatibility: Not every embroidery machine is compatible with PVC patches. Make sure to have the right machine with the appropriate accessories to start working with it.
Materials Needed:
- Embroidery Machine: Ensure your machine is suitable for working with thicker materials.
- PVC Patch & Desired item: Choose PVC patches with a flat, smooth surface and sewing channel.
- Embroidery Thread: Use a strong embroidery thread suitable for the thickness of the PVC.
Step-by-Step Guide:
- Prepare the PVC Patch:
- Ensure your PVC patch is clean and free of any dust or debris specially sewing channel. Place it on a stable surface.
- Hooping:
- Hoop the clothing or item you want that works with PVC. This is more crucial and vital part in this entire process. Making sure it is hooped correctly and tightly as a little looseness can cause the embroidery needle to go beyond the sewing channel, potentially resulting in the needle going around or outside of the patch sewing channel.
- Thread the Machine:
- Thread your machine with a strong embroidery thread that complements the color of your patch.
- Load the Design outline:
- Load the desired design outline onto your embroidery machine. Ensure the design is appropriately sized for your PVC patch.
- Stitch the Design:
- Start the machine, and it will begin stitching out your outline onto the PVC patch. PVC is a durable material, so the machine may need to use a bit more force than with fabric.
- Trim Excess Threads:
- After the machine has completed the design, carefully trim any excess threads from the front and back of the PVC patch and remove it from the hoop .
- Check Adhesion:
- Make sure that the stitches have gone all the way through the PVC material without damaging it. You can use a cloth sealant on the edges to make the stitching stronger if you need to.
Always refer to your embroidery machine’s manual for specific instructions on working with different materials. Additionally, practice on a scrap piece of PVC before applying the design to your actual patches.
When working with PVC patches on an embroidery machine, it’s important to choose the right tension, needle size, and thread for optimal results:

Using stabilizer for sewing PVC Patches :
Most of the time, you don’t need stabilizer when using an embroidery machine to sew a PVC patch onto a bag or your clothes. Most PVC patches are made of a plastic that is both elastic and pretty strong. Fabrics that are delicate or likely to tear need stabilizer, but PVC is not one of those fabrics.
However, there are a few situations where stabilizer might be helpful:
Very thin or lightweight bag material: If you’re sewing the patch onto a very thin or lightweight bag material, a lightweight stabilizer could help prevent the fabric from bunching up under the needle.
Uneven bag surface: If the bag surface where the patch is being sewn is uneven or has a lot of texture, a thin stabilizer could help create a smoother sewing surface.
Complex patch design: For very intricate or detailed patch designs, a tear-away stabilizer might be useful to support the stitches and prevent them from pulling on the PVC patch.
In most cases though, for standard PVC patch application with an embroidery machine, stabilizer won’t be necessary. If you’re unsure, it can help to test sewing a scrap piece of PVC patch material onto a similar fabric to your bag and see how it goes without stabilizer.
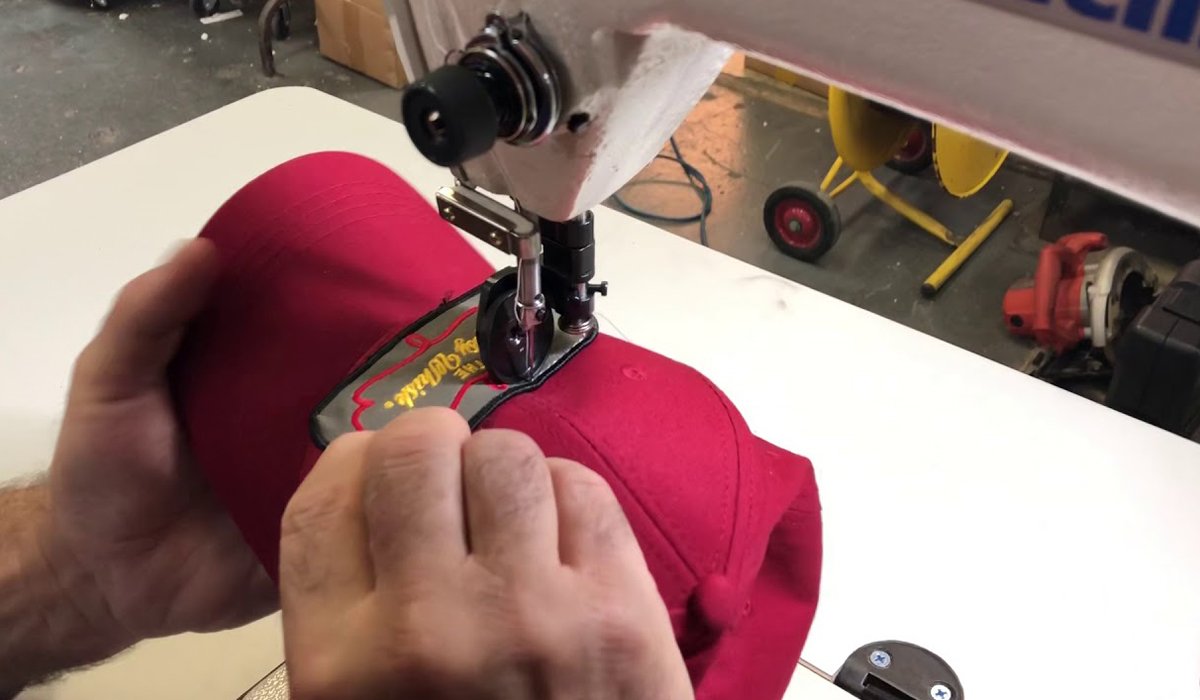
- Sewing Machine: The Versatile Warrior
- For all your custom patch stitching needs, the sewing machine is the go-to choice, especially when working with PVC patches. It stands out as the best option among these methods, providing more advantages than drawbacks.
Versatile Handling: From small to large, thin to thick, this machine adjusts effortlessly.
Faster than Hand-Stitching: Batch production becomes a easy task with increased efficiency.
Controlled Precision: Achieve straighter lines and cleaner finishes compared to hand-stitching.
But remember:
- Bulky patches beware: Very thick or stiff PVC might need a different approach.
- Footwork finesse required: Maneuvering around curves without puckering takes practice.
- Mastering the settings: It’s not magic, it’s practice and tweaking those dials.
To sum it up, sewing PVC patches onto your clothes is a simple and lasting method. If you prefer a personal touch and a budget-friendly option, go for hand-stitching. On the other hand, if you need a quicker and more consistent result, an embroidery machine is a good choice, but it requires some investment and training. The sewing machine is a versatile option, handling different sizes and shapes efficiently, but it needs some care with bulky patches. Choose the method that suits your needs, and with a bit of practice, you’ll achieve the best results.