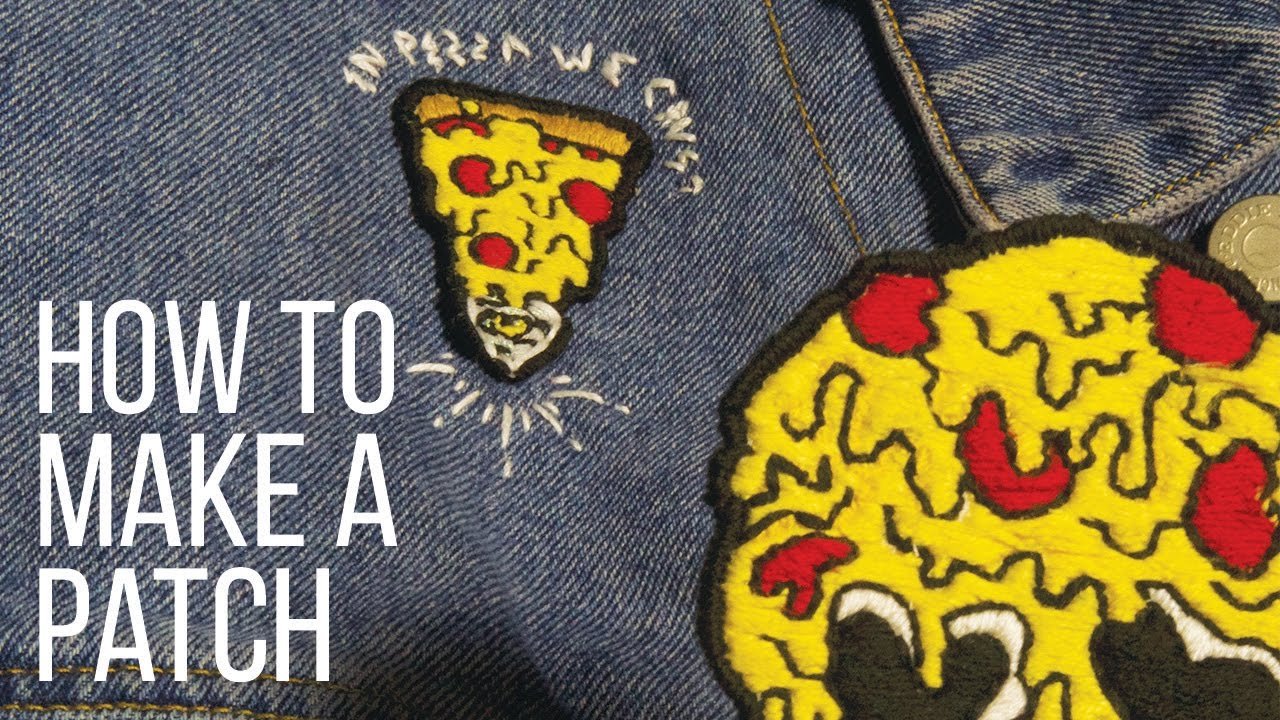
This details blog will guide you how to create an amazing and unique custom embroidered patches from scratch, it’s always fun to make your own patches at home for multiple occasion and there are various type of patches and their uses. By the end of this very blog, you will have all basic knowledge of creating your own perfect embroidery patch from scratch.
Step 1: Artwork Selection and Sizing
The initial step in creating embroidery patches is to decide your artwork, whether it’s your company logo or a custom design. Once your artwork is ready, determining the patch size becomes essential. Different patch sizes serve various purposes on different occasions and placements. For instance, if you plan to place the patch on the left or right chest of a shirt or jacket, the typical size ranges from 3 to 4.5 inches, with a minimum size of 3 inches for pocket patches. For hat patches, it’s recommended to keep the size no more than 2.5 inches. However, jacket back patches can vary in size from 7 to 18 inches, depending on the intricacy of the design and the garment’s size. For more detailed information about patch sizes and their ideal locations, please refer to our comprehensive guide on patch sizing.
Step 2: Patch logo digitization
Once you’ve chosen your patch size and design, you’ll need to convert it into a format that embroidery machines can use. This process, called Embroidery Logo Digitizing, is done using software like Wilcom EmbroideryStudio, Hatch Embroidery, Embird, PulseID, or Janome Digitizer. These programs take your design file, usually in PNG, JPEG, or PDF format, and turn it into a file that the embroidery machine can understand. This can take anywhere from 30 minutes to several hours, depending on the design’s complexity. These software tools allow you to adjust details like stitch types and densities for the best results when the design is stitched onto fabric.
For more information about our Embroidery Logo Digitizing service, please visit our website at https://lasvegasdesignsusa.com/. Our designing department utilizes Wilcom Embroidery Studio software to ensure top-notch results. The digitizing process is usually done by skilled industry experts to achieve the highest stitching quality. It’s crucial to hire an experienced digitizer for your patch digitizing needs. If you’re interested in getting your artwork digitized for embroidery patches, feel free to contact us at https://lasvegasdesignsusa.com/.
Step 3: What Material to use?
Types: There are different types of fabrics being used in embroidery industry for patches but common options include cotton, polyester, twill, or a blend of these materials and Felt
3.1: Purpose of Material:
Purpose: The fabric / Felt provides the foundation for the embroidered design and can influence the patch’s durability and flexibility. To know more about material read “How to choose best material for embroidery patches “.
Step 4: Choosing thread Types.
There are few different types of thread types we used during manufacturing of embroidery patches. Thread types are always used as per customer preference but for regular purpose we use viscose rayon thread which has high tensile strength and a perfect use for commercial embroidery machine. When vibrant and long-lasting colors are requires, we use polyester threads This is especially important in embroidery, where the visual appeal of the design is crucial. We also have glow in dark and metallic thread available To know more about available thread read visit our Thread color page.
Step 5: Choosing right color.
Matching the closest possible thread color with the actual artwork is crucial for the digitizer and machine operator before running a sample or full production. While we use our own embroidery thread brands, it’s considered best practice to utilize Madeira Classic Brands for their durability, standardization, and longevity.
Step 6: Setting up machine
After making all the necessary preparations and loading the design into the machine, it’s time to set up the embroidery machine for production. Here’s a general guide for doing so:
Production Sheet: Check the production sheet to ensure that the design’s color sequence is correct. Make sure you have the appropriate thread colors ready for each section of the pattern.
Hooping: Place the selected base material securely in the embroidery machine’s hoop. Make sure the material is stretched tightly enough to prevent wrinkles or moving while stitching.
Stabilizer: Don’t forget to apply stabilizer, which improves the quality of your embroidered stitches by supporting the cloth and prevents puckering. Before you begin embroidering, make sure the stabilizer is securely attached beneath the hoop.
Following these procedures and ensuring correct setup will help you optimize the embroidery machine for production and obtain high-quality embroidery output.
Step 7: Machine Inspection and Maintenance:
Check for Damage: Inspect the machine for any visible damage or issues.
Clean the Machine: Ensure that the machine is clean and free from dust or debris.
Oil and Lubricate: Lubricate moving parts according to the manufacturer’s recommendations.
Step 8: Thread and Needle Selection:
Choose the Right Thread: Select the appropriate embroidery thread based on the type of design and fabric.
Needle Selection: Use the correct needle size and type for the chosen thread and fabric. Needles may need to be changed depending on the project requirements.
Bobbin Setup:
Thread the Bobbin: Load the bobbin with the chosen bobbin thread, ensuring it is properly threaded.
Check Tension: Adjust the bobbin tension to match the upper thread tension.
Hooping:
Prepare the Fabric: Ensure that the fabric is clean and properly stabilized.
Select the Hoop: Choose the appropriate hoop size for the design and fabric.
Secure the Fabric: Hoop the fabric tightly, ensuring it is centered and squared within the hoop.
Design Placement:
Load the Design: Load the digital design file into the embroidery machine’s control panel.
Position the Design: Use the machine’s controls to position the design within the hooped area.
Tension Adjustment:
Upper Thread Tension: Adjust the upper thread tension to achieve the desired stitch quality.
Test Stitches: Run test stitches on a scrap piece of fabric to ensure proper tension.
Machine Calibration:
Stitch Length and Density: Adjust the stitch length and density settings to match the design requirements.
Machine Speed: Set the machine speed based on the complexity of the design and the fabric type.
Step 9: Sample Run
For the purpose of ensuring the quality of your digitized file and checking for any faults that may be caused by thread tension, alignment, or even thread breaks, it is always advisable to stitch out a sample file. Addressing any issues during the sample stitch-out ensures smooth production, especially when using a multiheaded machine.
Production Run:
Monitor Production: Keep an eye on the production process, checking for any signs of thread breaks, bobbin issues, or other malfunctions.
Quality Control: Regularly inspect finished items for quality and make adjustments as needed. trim away any excess thread after finishing production.
Step 10: Embroidery patches Border & Edges
There are Five primary types of borders and edges available for embroidery patches.
1-Merrow Border
2- Satin Border
3- No border
4- Heat cut/Laser Cut edges
5- Frayed Edges
In spite of the fact that there are many options for borders and edges for embroidery patches, it is essential to keep in mind that not every border or edge is appropriate for every kind of patch. It is important to note that there are certain restrictions, particularly with regard to merrow borders.
Irregular shapes should be avoided whenever possible while working with merrow border edges. As an alternative, you should go with forms such as ovals, rounds, or round rectangles because they are the ones that go best with merrow borders. On the other hand, if you have a patch that is designed in an irregular manner, satin or embroidery borders are more suitable for maintaining the overall quality and elegance of the patch.
Find out more about Border & Edges by clicking on this link.
Tip : always trim the excess thread after finishing production.
Step 11: Custom Embroidery patches Backing.
After your patches have been finished, the following step is to select the backing option that is most suitable for your needs, based on your preferences or your customer’s requirements. Here are some common backing options to consider:
Iron On-backing: The adhesive backing can be activated by applying heat with an iron as part of the iron-on backing process. This backing choice is not only convenient but also simple to carry out. Read more about how to apply iron-on backing here.
Adhesive Backing : Peel off the backing and firmly press the patch onto the desired item. This option provides a quick and easy way to attach patches without the need for sewing.
Velcro Backing: Velcro backing is a type of backing that utilizes hook and loop backing, which makes it simple to attach and remove patches. Patches that need to be connected and removed regularly are an ideal fit for this customization option.
Plastic Backing: In order to provide the patch more strength and stiffness, a small and thin plastic backing is typically added to it. This backing option gives the patch greater structure and endurance, contributing to its overall quality.
Sew-On backing : In order to attach the patch to the item of your choice, you will need to use a needle and thread to stitch it on securely. An attachment that is both secure and long-lasting can be accomplished with this conventional backing solution.
To learn more about each backing option and determine which one best suits your needs, read further details in our guide on backing options.
Step 12: Caring for Your Embroidery Patches
- Avoid excessive washing and drying to preserve the patch.
- If needed, hand wash with mild detergent and air dry.
- Store your patches in a cool, dry place to prevent damage.
These are DO’S and DONT’S by our experience while customizing embroidered patches 😊
Do’s:
- Choose high-quality fabric and thread for durability.
- Choose simple and clear designs for better visibility.
- Test your design on a sample fabric before embroidering on the actual patch.
- Secure loose threads
- Use a low to medium heat setting on your iron when applying heat to the patches.
- Use a pressing cloth or a thin piece of fabric to protect the embroidery while ironing trim excess fabric for a neat finish.
Don’ts:
- Avoid using intricate designs with too many small details if you are newbie
- Don’t rush the embroidery process; take your time for accuracy and run machine on slow speed
- Avoid using cheap or low-quality materials that may not withstand wear and tear.
- Don’t forget to properly hoop the fabric to ensure even tension.
- Avoid using high heat settings, as it can damage the fabric and the embroidery.
- Don’t leave the iron in one spot for too long, as it can scorch or melt the fabric.
- Avoid using excessive heat or pressure when ironing the patches.
With these detailed instructions, you’ll be well-equipped to create your own embroidered custom patches. Remember, practice makes perfect, so don’t be discouraged if your first attempts aren’t flawless. Keep experimenting and honing your skills to create stunning.